
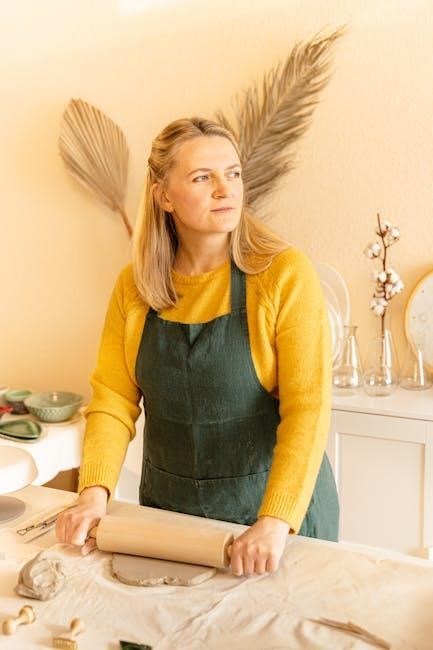
Welcome to the world of Sculpey III Clay Baking! This versatile polymer clay is perfect for crafting jewelry‚ miniatures‚ and sculptures. Bake it in a home oven at 275°F for 15 minutes per 1/4 inch of thickness. With proper techniques‚ Sculpey III creates durable‚ long-lasting pieces. Ideal for both beginners and experienced crafters‚ it’s a popular choice for artistic expression.
What is Sculpey III Clay?
Sculpey III Clay is a popular type of polymer clay designed for crafting and baking. It is non-toxic‚ pliable‚ and easy to work with‚ making it ideal for creating jewelry‚ miniatures‚ and sculptures. Available in various colors‚ Sculpey III can be mixed to achieve custom hues. It is baked in a home oven at 275°F (135°C) for 15 minutes per 1/4 inch of thickness. The clay hardens when baked‚ creating durable‚ long-lasting pieces. Perfect for both beginners and experienced crafters‚ Sculpey III offers versatility and artistic freedom‚ making it a favorite among polymer clay enthusiasts. Its ease of use and consistent results have made it a staple in crafting communities worldwide.
Preparation for Baking
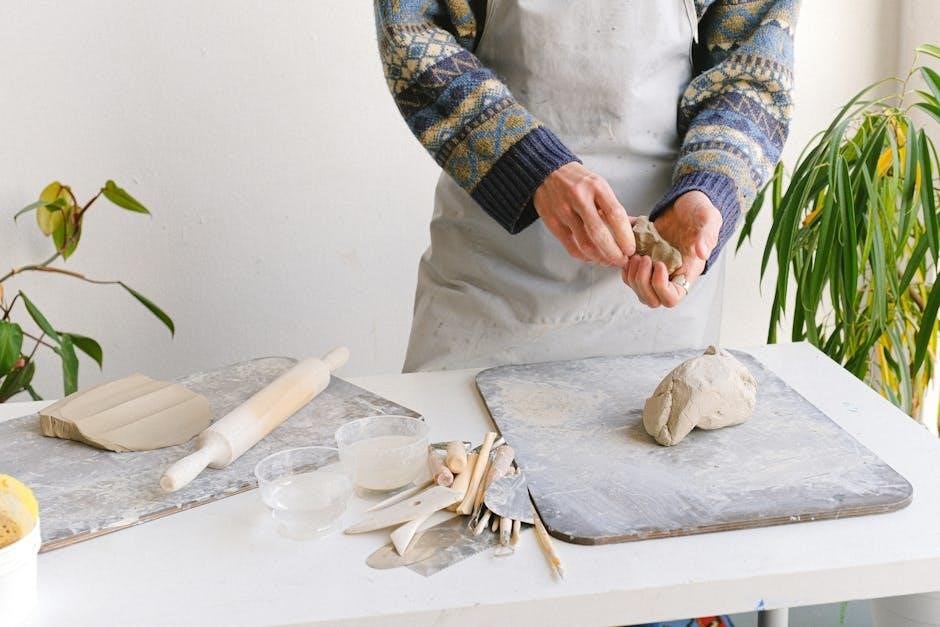
Properly prepare your Sculpey III Clay by conditioning it until pliable. Ensure your workspace is clean and dust-free. Gather essential tools like rollers‚ cutters‚ and a baking surface.
Conditioning the Clay
Conditioning Sculpey III Clay is essential for a smooth baking process. Start by warming the clay between your hands or using a pasta machine to soften it. Knead the clay thoroughly until it becomes pliable and even in texture. This step ensures the clay is easy to shape and minimizes the risk of cracks during baking. For stubbornly hard clay‚ gently warm it in short intervals or use a hairdryer on a low setting. Always condition one piece at a time and wash your hands between pieces to prevent color transfer.
Preparing the Workspace
Before baking Sculpey III Clay‚ ensure your workspace is clean and well-prepared. Cover your work surface with wax paper‚ a ceramic tile‚ or a heat-resistant mat to prevent sticking. Gather essential tools like rolling pins‚ cutters‚ and molds. Good lighting is crucial for detailed work. Keep the area dust-free to maintain clay quality. Preheating your oven while setting up saves time. Organize your tools and baked pieces separately to avoid mix-ups. A well-organized workspace enhances creativity and efficiency‚ making the baking process smoother and more enjoyable. Proper preparation ensures your Sculpey III projects turn out perfectly every time.
Tools and Materials Needed
To work with Sculpey III Clay‚ you’ll need essential tools like a pasta machine for thinning‚ shape cutters for precise forms‚ and sculpting tools for detailing. A rolling pin helps flatten the clay evenly. For baking‚ use an oven-safe surface such as a ceramic tile‚ glass‚ or a baking mat. A home oven or toaster oven is required‚ along with a thermometer to ensure accurate temperature control. Ventilation is key‚ so keep windows open or use a fan. Optional items include a timer for precise baking and a craft mat for workspace protection. Gather all materials beforehand to streamline your creative process and achieve professional results.
Baking Instructions
Preheat your oven to 275°F (135°C). Bake Sculpey III Clay for 15 minutes per 1/4 inch of thickness. Ensure proper ventilation and follow safety guidelines for best results.
Temperature and Time Guidelines
Preheat your oven to 275°F (135°C) for baking Sculpey III Clay. The recommended baking time is 15 minutes per 1/4 inch of thickness. For example‚ a piece that is 1/2 inch thick requires 30 minutes of baking. Ensure your oven is preheated and maintain consistent heat throughout the process. Avoid exceeding the recommended temperature or time to prevent overheating or discoloration. Always monitor the baking process to achieve the best results; Proper ventilation is essential for safety and optimal curing of the clay.
Recommended Baking Surfaces
For optimal results‚ bake Sculpey III Clay on surfaces like ceramic tiles‚ glass‚ or metal baking sheets. These surfaces ensure even heat distribution and prevent warping. Avoid using cardboard or wood‚ as they can release fumes or catch fire. Line your surface with oven-safe parchment paper or a Sculpey Work ’n Bake Mat for easy cleanup. Ensure the surface is clean and dry before placing the clay. Properly prepared surfaces help achieve a professional finish and prevent the clay from sticking. Always follow safety guidelines and manufacturer recommendations for the best baking experience.
Ventilation and Safety Precautions
Proper ventilation is essential when baking Sculpey III Clay. Always bake in a well-ventilated area to avoid inhaling fumes. While non-toxic‚ polymer clay releases particles during baking that can irritate sensitive individuals. Keep children and pets away‚ as baking should only be done by adults. Never leave the oven unattended during the baking process. Ensure the oven temperature does not exceed the recommended 275°F (135°C)‚ as excessive heat can cause unwanted reactions. Follow all safety guidelines provided by the manufacturer to ensure a safe and successful baking experience.
Baking in Different Ovens
Home ovens and toaster ovens are suitable for baking Sculpey III Clay. Preheat to 275°F (135°C) and bake for 15 minutes per 1/4 inch of thickness for consistent results.
Home Oven Baking
Preheat your home oven to 275°F (135°C) for baking Sculpey III Clay. Place the clay on a baking sheet lined with parchment paper or a heat-resistant surface. Bake for 15 minutes per 1/4 inch of thickness. Ensure even heating by avoiding overcrowding. Keep the oven vent open for proper airflow. An adult should monitor the process. Once baked‚ allow the clay to cool completely before handling. Home ovens provide consistent results‚ making them ideal for crafting jewelry‚ miniatures‚ or sculptures. Always follow safety guidelines and manufacturer instructions for optimal outcomes.
Toaster Oven Baking
For toaster oven baking‚ preheat to 275°F (135°C) and place the Sculpey III Clay on a heat-resistant surface like glass or ceramic tiles. Bake for 15 minutes per 1/4 inch of thickness‚ similar to a home oven. Ensure good ventilation and monitor the process closely. Toaster ovens are ideal for small projects due to their compact size and quick preheating. Use a thermometer to verify temperature accuracy‚ as toaster ovens can vary. Follow the same safety precautions as with a home oven‚ including adult supervision. This method is perfect for crafting detailed jewelry or miniatures with consistent results.
Baking Time and Thickness
Bake Sculpey III Clay at 275°F (135°C) for 15 minutes per 1/4 inch of thickness. Adjust time based on project thickness for optimal results and durability.
Calculating Baking Time Based on Thickness
For optimal results‚ bake Sculpey III Clay at 275°F (135°C). The baking time is determined by the thickness of the piece. A general rule is 15 minutes per 1/4 inch of thickness. For example‚ a piece that is 1/2 inch thick requires 30 minutes of baking. Always measure the thickest part of the piece to ensure proper curing. Thicker pieces may need extended baking times for strength and durability. Avoid overbaking‚ as it can cause discoloration or cracking. Use a timer and monitor the oven to ensure the clay bakes evenly and safely. This method guarantees a professional finish every time.
Common Mistakes to Avoid
Overbaking or underbaking can ruin your project. Ensure accurate oven temperature and timing. Avoid microwaving‚ as it can cause uneven curing. Always follow instructions carefully for best results.
Overbaking and Underbaking
Overbaking can cause Sculpey III clay to become brittle or discolored‚ weakening its structure. Underbaking leaves the clay soft and prone to breaking. Both issues stem from improper temperature or timing. Always monitor the oven closely and adhere to the recommended 275°F for 15 minutes per 1/4 inch of thickness. Use a timer to avoid overbaking and ensure the clay is fully cured. If unsure‚ slightly extending bake time is safer than underbaking. Proper curing ensures durability and a professional finish‚ making it crucial to follow guidelines precisely for optimal results every time. Avoid these common pitfalls for successful projects.
Cooling and Finishing
Allow Sculpey III clay to cool completely on a heat-resistant surface after baking. This prevents warping or cracking. Once cooled‚ sand or paint to achieve a polished finish.
Post-Bake Cooling Process
After baking‚ let Sculpey III clay pieces cool completely on a heat-resistant surface like glass or a ceramic tile. Cooling is crucial to prevent warping or cracking. Avoid handling the clay until it has reached room temperature‚ as heat can cause it to bend or break. If necessary‚ you can speed up the cooling process by placing the piece in the refrigerator for about 10 minutes. Once cooled‚ the clay becomes hard and durable‚ ready for finishing touches like sanding‚ painting‚ or sealing. Proper cooling ensures your project maintains its shape and integrity for long-lasting results.
Finishing Techniques
After cooling‚ Sculpey III clay pieces can be enhanced with various finishing techniques. Lightly sanding the surface with fine-grit sandpaper can smooth rough edges or bumps. For added color‚ use acrylic paints or sealers to protect the clay and give it a glossy finish. Embellishments like glazes‚ varnishes‚ or resin can add depth and durability. To add texture or detail‚ apply small beads‚ glitter‚ or decoupage before sealing. Proper finishing techniques ensure your Sculpey creations are visually appealing and long-lasting. These steps allow you to personalize your projects‚ transforming them into professional-looking art pieces or functional items.
Tips for Stronger Results
For stronger results‚ extend baking time beyond the recommended 15 minutes per 1/4 inch. Ensure proper ventilation and follow safety guidelines for optimal strength.
Extending Baking Time for Strength
Extending the baking time for Sculpey III clay can significantly enhance its strength and durability. While the standard recommendation is 15 minutes per 1/4 inch of thickness‚ increasing this time by 5-10 minutes can improve the clay’s resilience. This method is particularly beneficial for thicker pieces or functional items like jewelry. However‚ avoid overbaking‚ as it may cause cracking or discoloration. Always monitor the clay during extended baking and ensure proper ventilation. This technique ensures your creations are both sturdy and long-lasting‚ making it ideal for crafters seeking professional-grade results.
Safety Considerations
Ensure good ventilation when baking Sculpey III clay. Adult supervision is recommended. Never microwave. Avoid exceeding the recommended temperature or baking time for safety.
Important Safety Guidelines
Safety is crucial when working with Sculpey III clay. Always follow the manufacturer’s guidelines and ensure proper ventilation during the baking process. Keep the oven away from children and pets. Never bake Sculpey clay in a microwave. Overheating can cause fumes‚ so avoid exceeding the recommended temperature of 275°F (135°C). Use oven mitts to handle hot items‚ and ensure the baking surface is heat-resistant. Adhere to these safety precautions to ensure a safe and successful baking experience every time.

Best Practices for Optimal Results
For professional results‚ always follow the manufacturer’s guidelines and use recommended surfaces like glass or baking mats. Ensure even heating by preheating the oven properly.
Following Manufacturer Instructions
Adhering to the manufacturer’s guidelines ensures optimal results when baking Sculpey III Clay. Preheat your oven to 275°F (135°C) and bake for 15 minutes per 1/4 inch of thickness. Do not exceed the recommended temperature or baking time‚ as this can cause the clay to burn or become brittle. Always use a recommended baking surface‚ such as glass‚ metal‚ or a Sculpey Work ‘n Bake Mat‚ to prevent sticking. Proper ventilation is essential‚ and an adult should oversee the baking process. Follow these steps to achieve professional-quality‚ durable‚ and long-lasting pieces with your Sculpey III Clay creations.

Advanced Techniques
Explore layering and combining clays for intricate designs. Extend baking time for added strength. Experiment with complex shapes and textures to create unique‚ professional-quality pieces with Sculpey III.
Layering and Combining Clay
Layering and combining clays allow for intricate designs. Start by creating a base layer‚ then add details gradually. Use tools or household items to blend edges seamlessly. For combining‚ ensure clays are at room temperature and knead gently to mix. Bake as usual‚ following thickness guidelines. This technique enhances durability and creativity‚ making pieces stronger and more visually appealing. Proper layering prevents cracking and ensures a professional finish. Experiment with colors and textures to achieve unique effects in your Sculpey III projects.
Creative Projects
Discover the endless possibilities with Sculpey III! Create stunning jewelry‚ intricate miniatures‚ and personalized sculptures. Perfect for artistic expression and unique handmade crafts.
Jewelry Making and Miniature Sculptures
Sculpey III Clay is ideal for crafting intricate jewelry and miniatures. Its pliable texture allows for detailed designs‚ making it perfect for beads‚ pendants‚ and small sculptures. Artists can create complex patterns and shapes using tools or household items. For jewelry‚ bake pieces at 275°F for 15 minutes per 1/4 inch of thickness. Miniatures require similar attention to thickness for even curing. Once baked‚ pieces can be sanded‚ painted‚ or varnished for a polished finish. This clay is excellent for DIY projects‚ offering endless creativity for personalized accessories and decorative art. Always ensure proper ventilation and follow safety guidelines during the baking process.